Introduction
Have you ever wondered how life might have first flickered into existence on a harsh, lifeless Earth? Scientists recently discovered a fascinating clue: freezing and thawing cycles could have helped primitive cell-like structures called protocells grow, fuse, and even capture DNA. This process, demonstrated in laboratory experiments, reveals a simple yet powerful mechanism that may have set the stage for the complex chemistry of life. In this step-by-step guide, you will learn how to simulate those early Earth conditions using lipid membranes and freeze-thaw cycles. By following these steps, you can observe firsthand how tiny bubbles of fat behave differently depending on their membrane composition—some fusing into larger compartments and efficiently capturing DNA. This guide will walk you through the materials needed, the experimental procedure, and tips for obtaining clear, meaningful results. Whether you're a curious student, a hobbyist chemist, or a teacher looking for a captivating demonstration, this protocol offers a window into one of science's most profound questions: how did life begin?
What You Need
- Lipids: A set of different phospholipids (e.g., DOPC, DPPC, or egg PC) to create membranes with varying compositions. You can purchase these from a scientific supply company.
- Buffer solution: A simple aqueous buffer such as Tris-HCl or PBS at pH 7–8, which mimics the early ocean's salinity.
- DNA: A fluorescently labeled oligonucleotide (e.g., Cy3-tagged short DNA strand) to track capture efficiency. Alternatively, use a non-fluorescent DNA and later stain with a dye.
- Glass slides and coverslips: For microscopy observation. Clean them thoroughly to avoid contamination.
- Temperature control equipment: A programmable thermal cycler or a simple setup with a freezer (e.g., -20°C) and a water bath (e.g., 40°C).
- Microscope: A fluorescence or confocal microscope to visualize lipid vesicles and DNA uptake.
- Vortex mixer and sonicator: To prepare uniform vesicle suspensions.
- Microcentrifuge tubes: For mixing and incubation.
- Pipettes and tips: For precise liquid handling.
- Personal protective equipment: Lab coat, gloves, and safety goggles.
Step-by-Step Instructions
Step 1: Prepare Lipid Vesicles
- Dissolve your chosen lipids in chloroform to make stock solutions (e.g., 10 mg/mL).
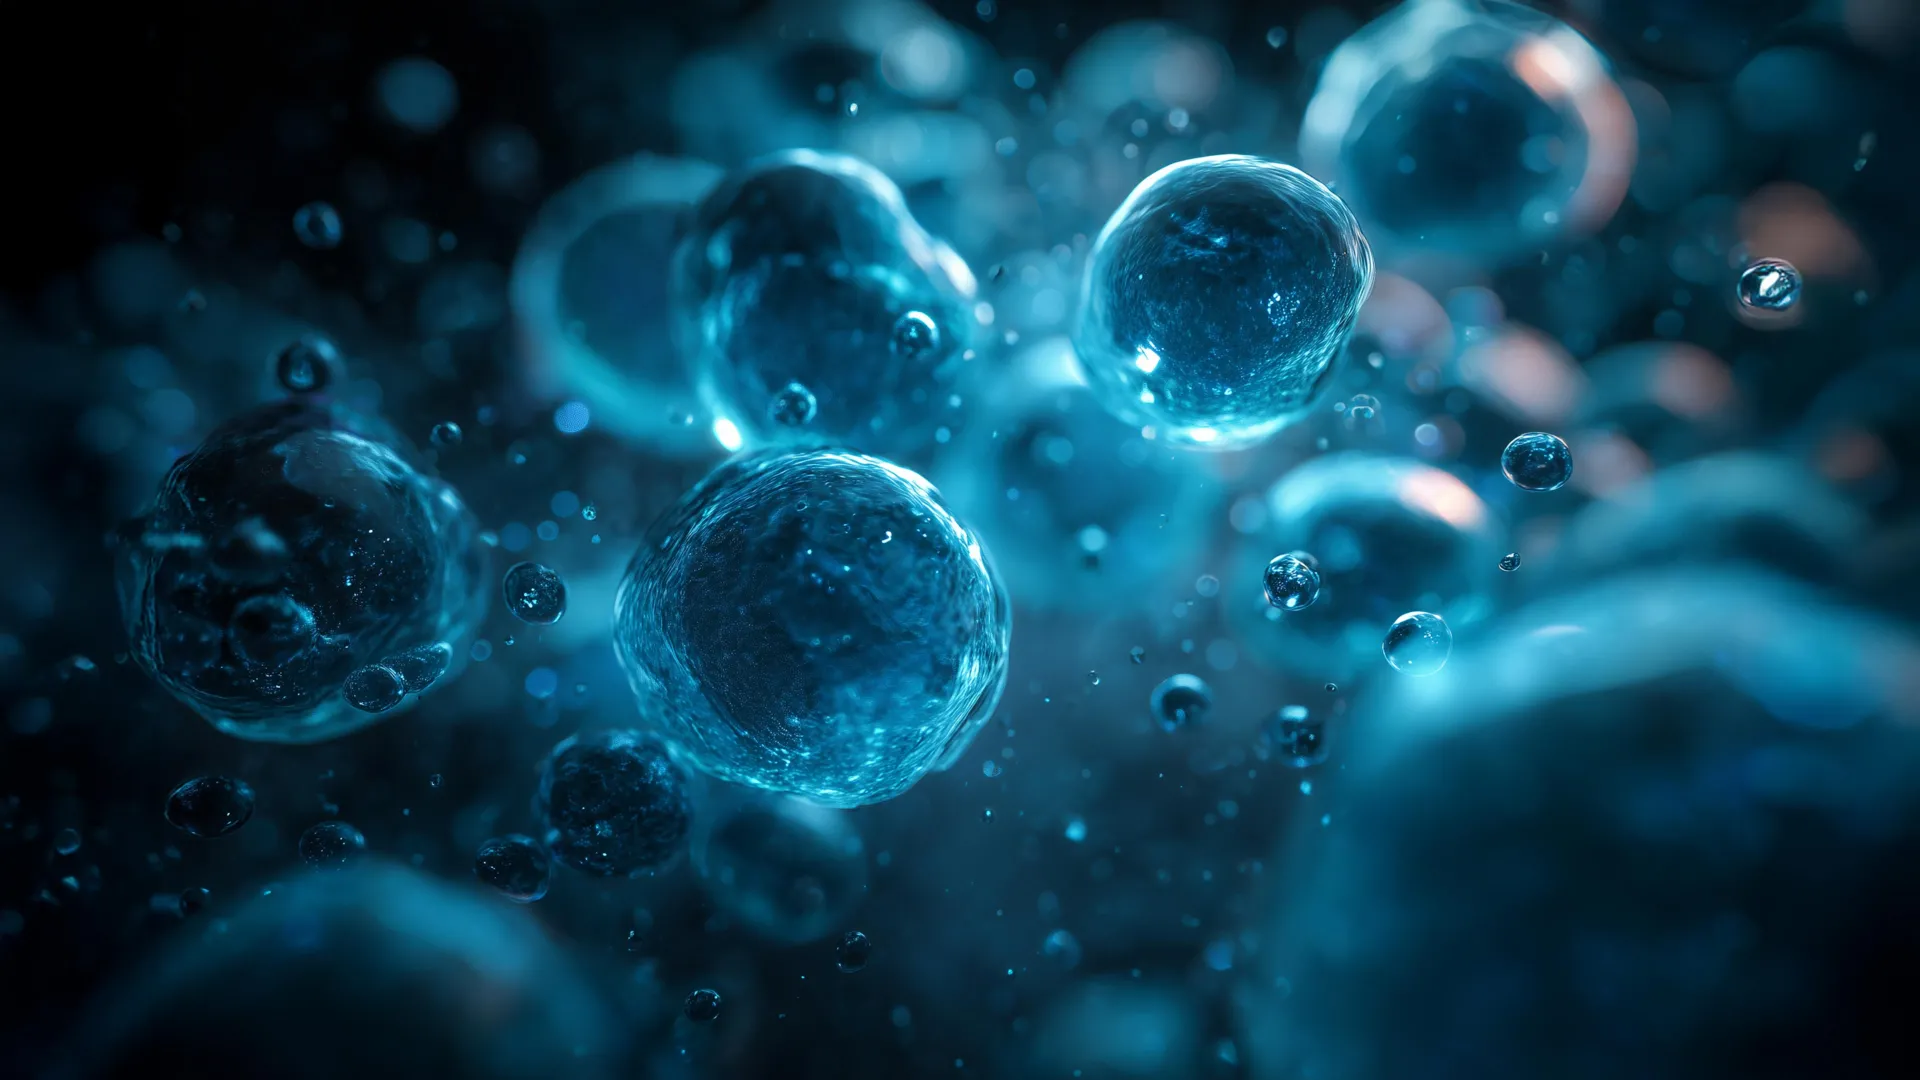
- Mix different lipids in ratios you want to test—for example, 100% DOPC, 70:30 DOPC:DPPC, or 50:50. This variation is key because the original experiments showed that membrane composition drastically changes behavior.
- Evaporate the solvent under a gentle stream of nitrogen or using a rotary evaporator to form a thin lipid film on the bottom of a glass vial.
- Place the vial under vacuum for at least 1 hour to remove residual solvent.
- Rehydrate the lipid film with buffer solution (e.g., 500 µL) and vortex thoroughly. This forms large multilamellar vesicles (LMVs).
- To reduce size and create unilamellar vesicles, sonicate the LMVs in a bath sonicator for 5–10 minutes, keeping the sample cool. Alternatively, extrude through a polycarbonate membrane with 100 nm pores.
- Store the vesicle suspension at 4°C until use, but for best results, use fresh vesicles within 24 hours.
Step 2: Add DNA and Set Up Freeze-Thaw Cycles
- In a clean microcentrifuge tube, mix 100 µL of your vesicle suspension with a small volume of DNA solution (e.g., 5 µL of 10 µM labeled DNA). The final DNA concentration should be in the low micromolar range.
- Transfer the mixture to a thin-walled PCR tube or a glass capillary to ensure even thermal transfer.
- Program your thermal cycler for 5–10 freeze-thaw cycles: each cycle consists of freezing at -20°C for 5 minutes, then thawing at 40°C for 5 minutes. If using a freezer and water bath, manually transfer the tube every 5 minutes—just be consistent.
- Important: After the final thaw, keep the sample at 4°C or on ice to preserve the fused structures.
Step 3: Visualize Fusion and DNA Capture
- Place a drop (10–20 µL) of your processed sample onto a clean glass slide and gently cover with a coverslip. Avoid pressing too hard to prevent vesicle rupture.
- Observe the sample under a fluorescence microscope using appropriate filter sets: for Cy3-labeled DNA, use a green excitation/emission filter.
- Look for differences between lipid compositions. You should see that some membranes (like those with higher DPPC content) produce larger fused vesicles that glow brightly due to captured DNA inside.
- Take representative images at multiple fields of view. Use software (e.g., ImageJ) to measure vesicle size and fluorescence intensity.
- For a control, repeat the experiment without freeze-thaw cycles—you should see minimal fusion and DNA uptake.
Step 4: Analyze and Compare Results
- Count the number of vesicles that contain internal fluorescence (DNA-positive) versus empty ones. Calculate the percentage of DNA capture for each lipid composition.
- Measure the average diameter of fused vesicles. The original experiments reported that certain membranes allowed fusion into much larger compartments—that's the 'chilling way' life may have started.
- Compare your data across different membrane types. Which ones promoted most fusion and DNA uptake? How does freezing and thawing affect the morphology?
- Graph your findings (e.g., bar charts of % DNA capture vs. lipid ratio) and draw conclusions about membrane properties that enable this prebiotic mixing.
Tips for Success
- Temperature control is critical: Consistent freeze-thaw cycles matter more than extreme speeds. Use a thermal cycler if available.
- Membrane composition drives behavior: Try several lipid ratios. Mixtures that include both saturated and unsaturated lipids often show the most dramatic effects, mimicking early Earth's diverse organic molecules.
- Use fresh lipids: Old or degraded lipids may not form proper vesicles. Store them under inert gas and at -20°C.
- Check for contamination: DNA or lipid aggregates can confuse results. Filter your buffer through a 0.2 µm syringe filter before use.
- Be patient with microscopy: Focus on finding a field where vesicles are well-separated. Too many overlapping structures make analysis difficult.
- Consider automation: For reproducibility, program the thermal cycler for multiple cycles and use the same timing every time.
- Think about the big picture: What you're mimicking is a process that could have concentrated and mixed key molecules on early Earth. Even simple experiments like this remind us that life's origins may have been a matter of simple physics and chemistry.
By following these steps, you have recreated a plausible scenario for how early protocells might have evolved. The fusion events you observed could have mixed different chemicals inside lipid compartments, creating the conditions needed for more complex chemistry—perhaps even the first steps toward life. Happy experimenting!